玩转Mixly – 10、Arduino AVR编程 之 传感器,执行器,通信,存储,factory

以下内容源自Mixly官方技术文档:
https://mixly.readthedocs.io/zh_CN/latest/Arduino/AVR/10Sensor.html
https://mixly.readthedocs.io/zh_CN/latest/Arduino/AVR/11Actuator.html
https://mixly.readthedocs.io/zh_CN/latest/Arduino/AVR/13Communicate.html
https://mixly.readthedocs.io/zh_CN/latest/Arduino/AVR/14Storage.html
https://mixly.readthedocs.io/zh_CN/latest/Arduino/AVR/16Factory.html
传感器
传感模块:超声波、DHT11、DS18B20(新增)

在传感器部分,我们将一些最常见的传感器相关指令进行编库,比如超声波测距模块,学生在使用超声波进行测距时,可直接运用该模块,只需将Trig与Echo管脚填好即可,这大大节省了学生的编程时间,这将更有助于使学生将更多的精力集中在创意实践上而非抓耳挠腮地编程。
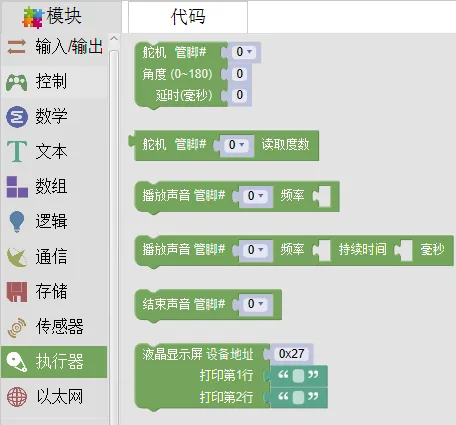
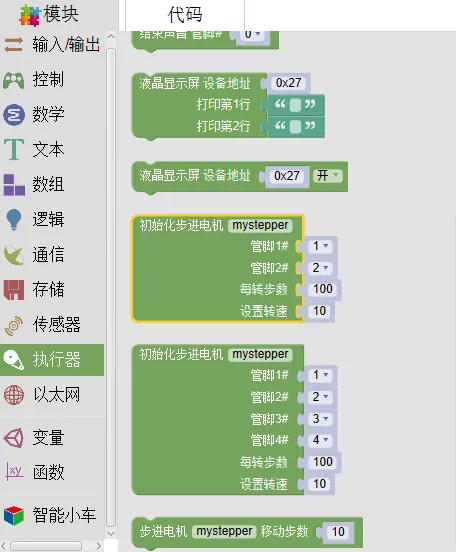
执行器
执行模块:声音播放、舵机控制、I2C液晶模块
通信
通信是为了方便人与计算机交互而采用的一种特殊通信方式。具体包括:串口通信(新增串口选择和波特率设置)、红外通信、I2C通信、SPI通信(新增)。
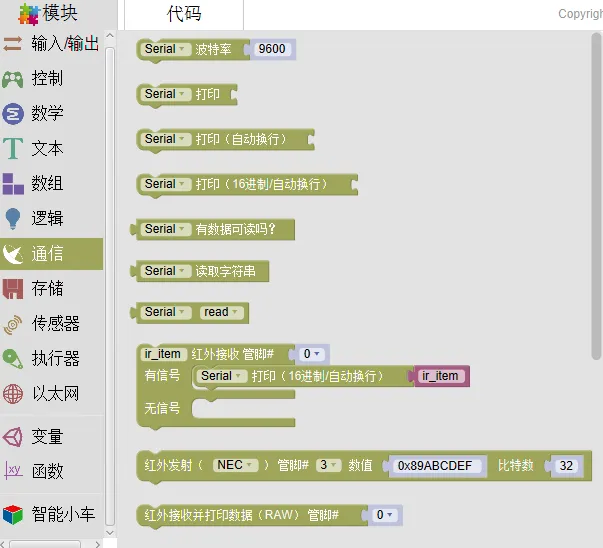
串口通信

串口通信功能学生可在串口监视器中查看。这一功能对于学生检查自己代码以及监视传感器数据提供了便利条件。 假设学生将LM35的温度传感器接到模拟管脚A0口,学生可通过 .. image:: images/13Communicate/commu4.png 指令观察当前室温。随后可能会提出疑问:当前室温怎么可能是58?这将引发学生进一步的思考造成该数据的可能性。
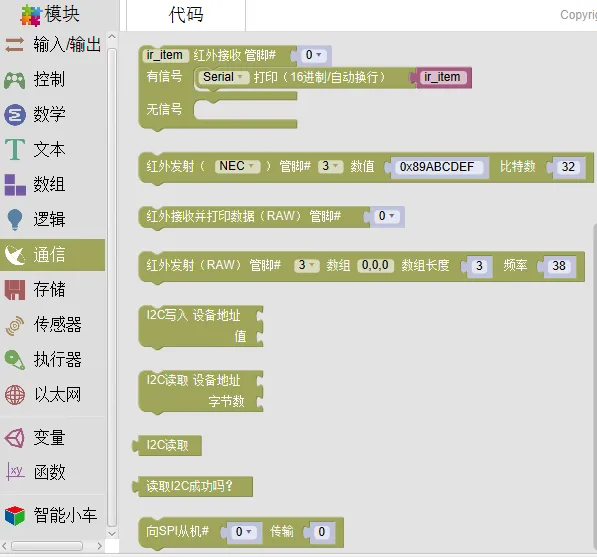
红外通信
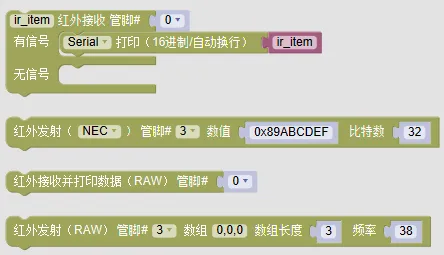
上图指令主要运用的是红外接收管与遥控器之间的数据发射与接收功能。学生掌握了红外通信的相关内容,便可以制作遥控风扇、遥控汽车等自主设计更强的创意电子产品。
I2C通信
I2C(Inter-Integrated Circuit)是同步通信的一种特殊形式,具有接口线少,控制方式简单,器件封装形式小,通信速率较高等优点。Mixly支持I2C的读取和写入,并且支持基于I2C协议的执行器。
SPI通信
SPI是串行外设接口(Serial Peripheral Interface)的缩写。SPI,是一种高速的,全双工,同步的通信总线,并且在芯片的管脚上只占用四根线,节约了芯片的管脚,同时为PCB的布局上节省空间,提供方便,拥有简单易用的特性。用户可以使用Mixly向SPI传输数据。
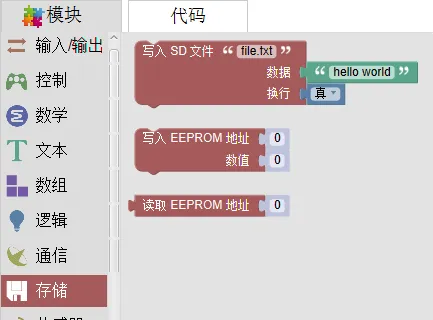
存储
存储模块:EEPROM读写,SD卡写入
Factory
Factory中的模块可以方便用户编写Mixly中不支持的传感器功能。 .. image:: images/16Factory/factory.png
将以RTC1307库为例,介绍利用factory中的模块,在Mixly快速使用Arduino标准库。
准备工作
1.从github.com等网站下载ds1307RTC Arduino库。 2.将库文件解压到Mixly/arduino-1.x.x/portable/sketchbook/libraries目录中。 3.打开Mixly自带的arduino IDE(路径Mixlyarduino-1.x.xarduino.exe),在软件中打开 库目录下的example范例,编译并上传,测试能否正常使用。如果不能正常使用,则需要更换库或者检查硬件问题。
重写程序
打开范例程序Mixly/arduino-1.x.x/portable/sketchbook/libraries/DS1307RTC/examples/ReadTime/ReadTest/ReadTest.ino,先分析程序,并适当简化程序。
源程序如下:
1
2
3
4
5
6
7
8
9
10
11
12
13
14
15
16
17
18
19
20
21
22
23
24
25
26
27
28
29
30
31
32
33
34
35
36
37
38
39
40
41
42
43
44
45
46
47
48
49
| #include #include "TimeLib.h" #include "DS1307RTC.h" void setup() { Serial.begin(9600); while (!Serial) ; // wait for serial delay(200); Serial.println("DS1307RTC Read Test"); Serial.println("-------------------"); } void loop() { tmElements_t tm; if (RTC.read(tm)) { Serial.print("Ok, Time = "); print2digits(tm.Hour); Serial.write(':'); print2digits(tm.Minute); Serial.write(':'); print2digits(tm.Second); Serial.print(", Date (D/M/Y) = "); Serial.print(tm.Day); Serial.write('/'); Serial.print(tm.Month); Serial.write('/'); Serial.print(tmYearToCalendar(tm.Year)); Serial.println(); } else { if (RTC.chipPresent()) { Serial.println("The DS1307 is stopped. Please run the SetTime"); Serial.println("example to initialize the time and begin running."); Serial.println(); } else { Serial.println("DS1307 read error! Please check the circuitry."); Serial.println(); } delay(9000); } delay(1000); } void print2digits(int number) { if (number >= 0 && number << span=""> 10) { Serial.write('0'); } Serial.print(number); } |
简化程序如下:
1
2
3
4
5
6
7
8
9
10
11
12
13
14
15
16
17
18
19
20
21
22
23
24
| #include #include "TimeLib.h" #include "DS1307RTC.h" void setup() { Serial.begin(9600); } void loop() { tmElements_t tm; if (RTC.read(tm)) { Serial.print(tm.Hour); Serial.print(':'); Serial.print(tm.Minute); Serial.print(':'); Serial.print(tm.Second); Serial.print(tm.Day); Serial.print('/'); Serial.print(tm.Month); Serial.print('/'); Serial.print(tmYearToCalendar(tm.Year)); } delay(1000); } |
Factory模式下模块:
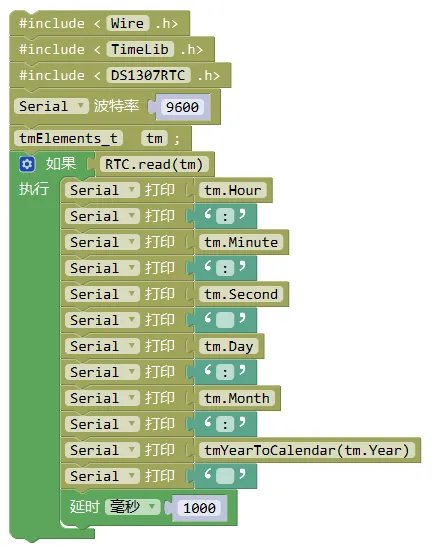
编写完成后,编译并上传,进行测试。测试利用factroy编写的程序效果是否与arduino IDE编写相同。